Mini-croissants de Nutella / Nutella mini-croissants

croissants4

Hola! Hoy os traigo una receta muy fácil de mini-croissants rellenos de Nutella!

Hey! Today I’m sharing with you a very easy recipe of Nutella filled mini-croissants!

Necesitarás:

  • un rollo de masa de hojaldre redondo
  • Nutella

You will need:

  • a roll of puff pastry 
  • Nutella

croissant7

Primero precalentamos el horno a 180ºC. Extendemos el hojaldre y, como si fuese una pizza y cortamos 12 triángulos con la ayuda de un cuchillo.

Colocamos una cucharadita de Nutella en la parte mas externa del triángulo. Con cuidado enrollamos el triángulo desde fuera hasta el centro intentando que no se salga la Nutella.

Preheat your oven at 180 ºC. Roll out the pastry. As if it was a pizza cut it into 12 slices using a knife.

Place a teaspoon of Nutella on each slice, on the outside part. Carefully roll up each slice starting from the outside to the middle trying to keep the Nutella inside.

croissant8

Colocamos los mini-croissants en una bandeja cubierta de papel de horno. Horneamos durante 7 minutos, hasta que estén dorados.

Place your mini-croissants on a paper lined tray. Bake them for 7 minutes until golden.

croissants5

Espero que os gusten!

Victoria♥

Hope you like them!

Victoria♥

Muffins de arándanos / Blueberry muffins

SONY DSC

Hola! Hoy os propongo una receta de muffins de arándanos. Buenísimos para desayunar, merendar, cenar o lo que queráis! Al añadir fruta a la masa, conseguimos unos muffins muy jugosos y esponjosos, tenéis que probarlos!

Hello again! Today I bring you a recipe of blueberry muffins. Perfect for breakfast, snack or dinnertime, always yummy! By adding fresh fruit to the dough we manage to get very juicy and fluffy muffins, you need to try them!

Receta adaptada del libro ‘Escuela de cocina’.

Para 12 muffins necesitarás:

  • 60 g de mantequilla fundida
  • 2 huevos
  • 160 g de azúcar
  • 300 g de crème fraîche
  • 240 g de harina
  • una pizca de sal
  • 12 g de levadura
  • 140 gr de arándanos (preferiblemente frescos)

This recipe is adapted from the book ‘Cooking school’.

For 12 muffins you will need:

  • 60 g of melted butter
  • 2 eggs
  • 160 g of sugar
  • 300 g of crème fraîche
  • 240 g of flour
  • a pinch of salt
  • 12 g of baking powder
  • 140 g of blueberries (better if fresh)

SONY DSC

Empezamos calentando el horno a 180ºC. Batimos los huevos con el azúcar. Cuando la mezcla tenga textura cremosa añadimos la mantequilla derretida y luego la crème fraîche en dos tandas.

En otro bol mezclamos la harina, sal, levadura y arándanos. Hacemos un hueco en el centro de los ingrediente secos, vertemos los ingredientes líquidos y mezclamos todo.

Repartimos la masa en nuestras capsulas y horneamos a 180ºC durante 25 minutos (15 si los muffins son pequeños).

SONY DSC

Start by preheating the oven at 180ºC. Beat the eggs and the sugar until you get a creamy mixture, then pour in the melted butter and keep mixing. Add the crème fraîche in two parts and blend together.


In another bowl mix the flour, salt, baking powder and blueberries. Make a hole in the middle of your dry ingredients and mix in the wet ingredients.


Scoop the dough into your paper cases and bake for 25 minutes (15 if you are making small muffins) at 180ºC.

SONY DSC

Gracias por leerme!

Victoria ♥


Thanks for reading me!

Victoria

Couscous con brochetas de solomillo de cerdo/ Couscous and pork skewers

couscous

Hola! Hoy os traigo una receta salada de origen marroquí. Este verano tuve la oportunidad de hacer un viaje solidario con la Asociación Viento Norte-Sur, en el que llevamos donaciones y ayudamos en un Orfanato de Essaouira. Nunca antes había estado en Marruecos y me encantó. Prometo contaros más detalles del viaje próximamente, pero de momento, quiero dedicar este post a la Asociación Viento Norte-Sur por la experiencia tan inolvidable que nos hicieron vivir.

Hey! Today I bring you a Moroccan recipe! This summer I had the chance to join a volunteer trip organized by a Spanish association called Viento Norte-Sur. We brought lots of donations and helped at a orphanage in the beautiful town of Essaouira. It was my first time in Morocco and I loved it. I will tell you more about my trip in a future post but today I want to dedicate this recipe to the association Viento Norte-Sur for the amazing time they made me spend there.


Me gustó mucho la comida marroquí, la verdad es que me encanta probar la comida típica de los sitios a donde voy. Fue interesante probar platos de los que nunca había oído hablar, o que había visto en libros de recetas pero nunca me había propuesto hacer. Esta receta (del blog de Martha Stewart) es bastante fácil y una buena idea para preparar sorprender a vuestros amigos en casa.

I really liked the food there, as I usually do all around the world. I was great to try dishes that I’d never heard about and other that I’d seen in cookbooks but had never tried to make. This recipe (from Martha Stewart’s blog) is pretty simple and great for a friend’s dinner at home.

Para 4-5 personas necesitaréis:

  • una cucharadita de mostaza en grano
  • 1 cucharadita de miel
  • el zumo de un limón
  • 1 cucharada de tomillo (mejor fresco)
  • sal y pimienta
  • 3 cucharadas de aceite de oliva
  • 2 dientes de ajo rallados
  • 800gr de solomillo de cerdo
  • media cebolla roja
  • 1 calabacín pequeño
  • 1 pimiento rojo
  • 1 pimiento amarillo
  • 350gr de couscous
  • palitos de brocheta

For 4-5 people you will need:

  • 1 teaspoon of Dijon mustard
  • 1 teaspoon of honey
  • Juice of 1 lemon
  • 1 tablespoon of thyme (better if fresh)
  • Salt and freshly ground black pepper
  • 3 tablespoons of olive oil
  • 2 cloves garlic, minced
  • 800g of pork tenderloin
  • 1/2 medium red onion
  • 1 small zucchini
  • 1 red pepper
  • 1 yellow pepper
  • 350 gr. of couscous
  • Skewers

SONY DSC

En un bol mezclamos la mostaza, la miel, el zumo de limón, tomillo, 1 cucharada de aceite, sal, pimienta y uno de los dientes de ajo rallados. Cortamos el solomillo en cubos de entre 2 y 3 cm. Añadimos al bol y nos aseguramos de que quede cubierto de la mezcla. Tapamos y dejamos reposar al menos media hora.

Picamos todas nuestras verduras en cubos pequeñitos. Ponemos a calentar una cazuela con 2 cucharadas de aceite a fuego medio-bajo, añadimos la cebolla y el ajo y cocinamos unos 5 minutos.Añadimos el calabacín y los pimientos, subimos el fuego y cocinamos otros 5 minutos.

In a bowl mix the mustard, honey, lemon juice, thyme, 1 tbsp. of olive oil, salt, pepper and one of the minced garlic cloves. Chop the pork tenderloin into 2-3 cm cubes and add to the mixture. Cover and let it stand for at least 30 minutes.

Cut all you veggies into small cubes. Heat 2 tbsp. of olive oil in a saucepan at medium-low heat. Add the onion and garlic and cook for 5 minutes. Then add the zucchini and peppers, turn up the heat and cook for 5 more minutes.

Añadimos el couscous a la cazuela y vertimos 350ml de agua, mezclamos bien. Retiramos del fuego y dejamos tapado durante 5 minutos. Una vez listo añadimos sal y pimienta al gusto.

Add couscous to the saucepan and pour in 350ml of water, stir well. Turn off heat, cover and let sit for 5 minutes. Season with salt and pepper

 SONY DSC

Ponemos a calentar la plancha (o sartén) pintada de aceite. Montamos las brochetas con 4 o 5 trozos de carne y las sazonamos con sal y pimienta. Cocinamos por cada lado hasta que estén bien hechas. Servimos sobre el couscous.

Heat a grill or grill pan brushed with some oil. Thread pork on skewers and season with salt and pepper. Grill on each side until done. Serve over couscous


Espero que os haya gustado! Gracias por leerme!

Victoria ♥

Hope you liked it! Thanks for Reading me!

Victoria


P.D. Os recomiendo que visitéis la web de la Asociación Viento Norte-Sur y os animo a mirar sus proyectos y voluntariados. Los coordinadores son muy simpáticos y seguro que os tratarán genial!


P.S. I recommend you to visit the Association Viento Norte-Sur webpage and check out their projects and volunteering programs. The people who work there are very nice and will take good care of you!

moroco

Galletas bicolores / Two-tone cookies

SONY DSC

Hola! Espero que la vuelta a clase no haya sido muy dura para vosotros! Hoy os traingo una receta de galletas, una mezcla de chocolate y vainilla. Espero que os gusten!

Hello! I hope that your back to work week hasn’t been too tough on you! Today I bring you a cookie recipe, a mix between vanilla and chocolate. Enjoy them!

Para unas 30 galletas:

  • 250 g de harina
  • 125 g de mantequilla a temperatura ambiente
  • 1 huevo
  • 150 g de azúcar glass
  • 20 g de cacao en polvo
  • 1 cucharadita de extracto de vainilla
  • azúcar blanquilla

For around 30 cookies:

  • 250 g of flour
  • 125 g of softened butter
  • 1 egg
  • 150 g of icing sugar
  • 20 g of cocoa powder
  • 1 tsp of vanilla extract
  • some white sugar

SONY DSC

Primero precalentamos el horno a 180ºC. Para esta receta vamos a batir a mano, con la ayuda de una espátula de silicona.

Trabajamos la mantequilla con el azúcar glass y la vainilla, añadimos el huevo y mezclamos hasta que se integre bien.

Incorporamos la harina y mezclamos formando una bola sin trabajar demasiado la masa. Separamos la masa en 2 y añadimos el cacao a una mitad.

Metemos las masas a la nevera durante 15 minutos.

Preheat your oven at 180ºC. For this recipe we will use an spatula, no electric mixer is needed.

Mix the icing sugar, vanilla and butter together, then add the egg and continue mixing until well combined. 

Fold in the flour and form a ball of dough. Separate the ball in two and add the cocoa powder to one of the portions.

Place both doughs in the fridge for 15 minutes.

bicolor1

Extendemos ambas masas sobre una superficie enharinada, dejándolas con unos 4 milímetros de grosor y dándole forma rectangular (20×15 cm).  Ponemos la masa de chocolate sobre la de vainilla y enrollamos.

Rebozamos el rollo de masa en azúcar y cortamos en rodajas de unos 4-5 mm de grosor. Las colocamos en una bandeja con papel de hornear y metemos al horno durante 15-20 minutos hasta que veamos que empiezan a coger color.

Roll both doughs out so that they are about 4 mm thick and in a rectangular shape (20×15 cm). Place the chocolate dough on top of the white dough and roll them up like a Swiss roll.

Coat with some white sugar and cut into 4-5 mm thick rounds. Place them on a paper lined baking tray and bake for 15-20 minutes until they start to get some color.

bicolor2

Dejar enfriar antes de servir. Espero que os haya gustado!

Gracias por leerme!

Victoria ♥

Wait for them to cool down before serving. Hope you liked them!

Thanks for stoping by!

Victoria ♥

SONY DSC

Cupcakes con pepitas de chocolate / Chocolate chip cupcakes

SONY DSC

Hola! Hoy toca receta de cupcakes con pepitas de chocolate. Las preparé para el cumpleaños de mi amiga Begoña y tuvieron bastante éxito! Tenéis que probarlas!

Hey! Today is a good day for a cupcake recipe: chocolate chip cupcakes! I baked them for my friend Begoña’s birthday and they were a blast! You need to try them!

Para 12 cupcakes necesitarás:

  • 110 g de mantequilla a temperatura ambiente
  • 2 cucharadas de azúcar moreno
  • 75 g de azúcar blanquilla
  • 2 huevos
  • 175 g de harina
  • 1 cucharadita de levadura
  • 1 pizca de sal
  • 120 ml de leche (preferiblemente que sea entera)
  • 100 g de pepitas de chocolate (reservaremos algunas para decorar)

Para el frosting:

  • 150 g de mantequilla a temperatura ambiente
  • 250 g de azúcar glass
  • una cucharadita de extracto de vainilla

For 12 cupcakes you will need:

  • 110 g of butter, room temperature
  • 2 tbsp of brown sugar
  • 75 g of white sugar
  • 2 eggs
  • 175 g of flour
  • 1 tsp of baking powder
  • a pinch of salt
  • 120 ml of milk (better if it’s whole milk)
  • 100 g chocolate chips (keep some for decorating)

For the frosting:

  • 150 g of butter, room temperature
  • 250 g of icing sugar
  • 1 tsp of vanilla extract

chip1

Empezamos calentando el horno a 190ºC. Batimos la mantequilla y ambos azucares hasta que la mezcla sea blanda y ligera.

Añadimos los huevos y batimos hasta que estén bien integrados. Incorporamos el harina tamizada, la levadura  y la pizca de sal. Vertemos la leche y las pepitas de chocolate y mezclamos a mano con la ayuda de una espátula.

Pasamos la masa a nuestras cápsulas de papel y horneamos a 190ºC durante 20-25 minutos.

chip3

Let’s star by pre-heating our oven at 190ºC. Beat the butter and both sugars until light and fluffy.

Beat in the eggs and mix until they are fully incorporated with the mixture. Sift in the flour, baking powder and salt and stir into the mixture. Add the milk and the chocolate chips and stir with the help on an spatula.

Spoon the mixture in the 12 paper cases and bake for 20-25 minutes at 190ºC.


Para el frosting batimos la mantequilla durante 1 minuto, añadimos el azúcar glass y el extracto de vainilla y batimos otros 4 minutos hasta que la mezcla sea ligera. Una vez la cupcakes estén completamente frías las decoramos con la ayuda de una manga pastelera. Para mi diseño he utilizado una boquilla redonda y he apretado y levantado para formar cada cucurucho. Decorar con pepitas de chocolate.

For the frosting beat the butter for one minute, then add the icing sugar and the vanilla and beat for 4 more minutes, until smooth. Decorate your cupcakes with a piping bag when they are completely cooled down. For my design I used a round nozzle and pressed and lift up for making each little cone. Decorate with the remaining chocolate chips.

chip2

Hasta la próxima!

Victoria  

See you next time!

Victoria 


Viaje a Grecia + Receta / Trip to Greece + Recipe

ensalda

Hola otra vez! Ya estoy de vuelta definitiva, calentando motores para la vuelta a la rutina. La semana pasada estuve de viaje en Grecia, mas concretamente en Mikonos y en Cape Sounio. Y hoy os traigo una receta muy típica griega y algunas fotos de los sitios en los que he estado. La ensalada griega es de lo más simple que hay pero tiene algo que la hace adictiva. De lo malo malo no lleva chocolate y es sana!

Hello again! I’m back home preparing for going back to the routine. Last week I went to Greece, more concretely to Mikonos and Cape Sounio. That’s why today I bring you a greek recipe as well as some pictures from my trip. The greek salad is absolutely simple but for some reason you can’t stop eating it! At least it is healthy and has no chocolate in it! There have been day when we have had it for both lunch and dinner!

Para 4 personas necesitarás:

  • 3 tomates 
  • 1/2 pepino  
  • 1 pimiento verde
  • 1 cebolla
  • queso feta
  • alcaparras
  • aceitunas
  • aceite, vinagre y sal
  • oregano


For 4 people you will need:

  • 3 tomatoes
  • 1/2 cucumber
  • 1 green pepper
  • 1 onion
  • feta cheese
  • capers
  • olives
  • olive oil, vinegar and salt
  • oregano


Cortamos nuestras verduras y las colocamos en un bol. Añadimos algunas aceitunas y alcaparras. Coronamos con un corte de queso feta o también podéis ponerlo en cubitos pequeños, según el tipo que encontréis en el supermercado. 

Aliñamos al gusto y espolvoreamos un poco de oregano por encima. Y listo!

Chop your vegetables and put them in a bowl. Add some olives and capers. Top with a piece of feta cheese, or small pieces depending of what type you can find at your store. Add the seasoning and sprinkle some oregano on top of it. It’s ready!


poseidon

Atardecer sobre el templo de Poseidon (Cape Sounio). Impresionante.

Sunset on Poseidon’s Temple (Cape Sounio). Amazing!


image

Mojito de piña en la playa del resort Grecotel en Cape Sounio.

Pinapple Mojito at Cape Sounio Grecotel Beach.


delos1

delos2


Vistas desde lo alto de la isla arqueológica de Delos. Esta isla conserva una autentica cuidad griega en ruinas. Muy interesante, os recomiendo visitarla si tenéis ocasión.

Views from the top of Delos Island. This island has an the authentic ruins of an antique antique city. Very interesting, I totally recommend you to visit it if you have the chance.


veneti3

Veneti, una impresionante pastelería que no tiene desperdicio. Desde pastelería tradicional griega hasta macarrons franceses pasando por todo tipo de tartas y smoothies!

Veneti, an amazing bakery that you need to stop by. You can find from traditional greek pastry to french macarrons, as well as tons of different cakes and smoothies.

cala

Una de las muchas calas que harán que te enamores de Grecia.

One of the many beaches that will make you fall in love with Greece.

Gracias por leerme!

Victoria 

Thanks for stoping by!

Victoria 

goodbye

Oreo Brownie

SONY DSC

Hola! Hoy toca un clásico: brownie de chocolate, pero con un toque especial: oreos! Una bomba de chocolate que resultó ser un postre muy apreciado durante mi Erasmus en Inglaterra. Tenéis que probarlo!

Hi! Today I bring you a classic recipe: Brownie, but… with a special ingredient: oreos! A mouthwatering chocolate recipe that happened to be very appreciated by my friends during my Erasmus in England. You need to try it!

Necesitareis:

  • 200 gr de chocolate negro
  • 165 gr de mantequilla
  • 3 huevos enteros + 2 yemas
  • 100 gr de azúcar blanquilla
  • 65 gr de azúcar moreno
  • 50 gr de harina
  • 1 cucharada de cacao en polvo
  • 2 cucharaditas de esencia de vainilla
  • una pizca de sal
  • 18 oreos 
  • pepitas de chocolate


You will need:

  • 200 gr of dark chocolate
  • 165 gr of butter
  • 3 eggs + 2 egg yolks
  • 100 gr white sugar
  • 65 gr brown sugar
  • 50 gr of flour
  • 1 tbsp of cocoa powder
  • 2 tsp of vanilla essence
  • a pinch of salt
  • 18 oreos
  • chocolate chips

brownie3

Precalentamos el horno a 180 ºC. Empezamos derritiendo el chocolate y la mantequilla al baño maría. Una vez mezclado retiramos del fuego y dejamos que temple.

En un bol batimos con la batidora de varillas los 3 huevos y las dos yemas con el aroma de vainilla y la pizca de sal hasta que tripliquen su volumen. Después añadimos el azúcar blanca, mezclamos bien y añadimos el azúcar moreno, batimos hasta que esté todo bien integrado.

A partir de aquí guardamos la batidora y mezclamos a mano con una espátula. Incorporamos el chocolate derretido y mezclamos bien con movimientos envolventes. Añadimos la harina y el cacao, ambos tamizados, y mezclamos bien.


Preheat your oven at 180ºC. Start by melting the chocolate and the butter in a double boiler. Once mixed remove from heat and allow it to come back to room temperature.

In a bowl mix with your electric beater the eggs, the 2 extra yolks, the vanilla essence and a pinch of salt until the mixture was triple it’s volume. Then add the white sugar and mix. Pour in the brown sugar and continue mixing.

From this point we will not use the electric beater any more. Mix by hand with the help of an spatula. Add the melted chocolate and mix until fully incorporated. Then mix in the flour and the cocoa powder, both sieved.

brownie

Ahora pasamos la mezcla al molde, preferentemente cuadrado y que habremos untado con mantequilla. Vertimos la mitad de la masa y alisamos. Colocamos parte de las oreos cortadas en trocitos y añadimos pepitas de chocolate. repetimos la operación con el resto de la masa, oreos y pepitas.

Horneamos a 180ºC durante 25 minutos, es un brownie así que no tiene que quedar completamente hecho, es mejor que quede un poquito húmedo por el centro ya que con su propio calor se acabará de hacer.

brownie2

In a square cake tin, that we have previously greased with some butter, pour in half of the brownie dough. Then place a layer with half of your oreo cookies (broken in small pieces) and add some chocolate chips. Repeat with the rest of the dough and cookies making a second layer.

Bake for 25 minutes at 180ºC. Remember that brownies aren´t supposed to be fully cooked so be careful not to leave it too long in the oven.

SONY DSC

Servir solo o con una bola de helado. Espero que os guste!

Victoria 

P.D. gracias a mi tío Jon por compartir conmigo esta riquísima receta.


Serve by it self of with some vanilla ice cream. I hope you’ve liked!

Victoria 

P.S. A special thank you to my uncle Jon who shared with me this recipe.


Sushi!

 SONY DSC

Hola de nuevo! Espero que estéis pasando un buen verano! Yo he aterrizado en casa para unos días, después de varios viajes que me han inspirado para mis siguientes recetas. Pero de momento vamos con un plato asiático: el SUSHI.

Es mi comida favorita y también la de mi amiga Inés así que decidimos hacer una comida veraniega de sushi casero, en concreto makis.

Hello again! I hope you are having a wonderful summer! I just stopped by home for a few days after some vacation away. I will tell you about my holiday soon. But for the moment let have an asian dish: SUSHI.

Sushi is my favorite food, same as my friend’s Inés so we decided to prepare a summer lunch with maki sushi as a main course.

Para cuatro tipos de maki sushi (un rollo de cada tipo) necesitarás:

  • 250 gr de arroz para sushi
  • 2 cucharadas de condimento para sushi
  • 4 hojas de alga nori
  • 3 cortes estrechos de salmón 
  • 3 cortes estrechos de atún rojo
  • 4 palitos de cangrejo
  • 5 langostinos cocidos
  • 1 aguacate maduro
  • algunos trozos de mango
  • queso Philadelphia
  • wasabi
  • salsa soja
  • 1 esterilla para enrollar

 SONY DSC

For four types of maki sushi (one roll per type) you will need:

  • 250 gr. of sushi rice
  • 2 tbs of sushi condiment
  • 4 sheet of nori seaweed
  • 3 small pieces of salmon
  • 3 small pieces of red tuna
  • 5 cooked prawns
  • 4 crab sticks
  • 1 avocado, ripe
  • some mango pieces
  • cream cheese
  • wasabi
  • soy sauce
  • 1 sushi mat

 SONY DSC

La preparación del arroz

Primero, lo enjuagamos varias veces para quitarle el almidón, podemos ayudarnos de un colador.

En un cazo ponemos el arroz y 325 ml de agua, lo cubrimos y llevamos a ebullición. Cuando rompa a hervir, bajamos la temperatura y dejamos a fuego lento durante 10 minutos. Apagamos el fuego y dejamos el arroz reposar durante otros 15 minutos. No lo destapéis en ningún momento! 

Después, pasamos el arroz caliente a un bol y mezclamos con el condimento para sushi con la ayuda de una espátula, con cuidado para no romper el arroz. Cuando lo vayamos a utilizar deberá tener un aspecto brillante y estar a temperatura ambiente.

How to prepare de rice

First of all we rinse it in order to remove the starch, we can use a strainer for this.

Put you rice in a sauce pan and add 325 ml of water,cover it and heat it until it boils. Once boiling reduce the temperature and cook at low heat for 10 minutes. Turn off the heat and allow to set for 15 minutes, do not uncover!

Place your rice in a bowl and add the sushi condiment. Mix carefully with the help of an spatula so that the rice grains don’t break. When you use it it needs to be at room temperature and needs to have a shiny aspect.

SONY DSC

Elegimos 4 tipos de makis :

  1. Maki de atún y aguacate
  2. Maki de salmón, mango y queso crema
  3. Maki de langostinos y aguacate
  4. Cangrejo, mango y aguacate

Colocamos la esterilla, en sentido horizontal, sobre una superficie plana. Encima ponemos una de nuestras hojas de alga nori con el lado brillante hacia abajo. Extendemos una capa de arroz, no demasiado gruesa, sobre el alga. Dejando un margen de 2 cm en uno de los lados. En el lado contrario es donde vamos a ir colocando nuestros ingredientes. Antes de nada extendemos un poquito de wasabi en el extremo del arroz. Pica mucho así que no os paséis. Después hay que poner el resto de ingredientes horizontalmente sobre el wasabi.

SONY DSC

Para enrollarlo, empezamos por el lado que contiene los ingredientes con la ayuda de la esterilla. Poco a poco vamos levantando la esterilla a medida que avanzamos, manteniendo siempre una presión uniforme para que el rollo no salga mas gordo por un lado que por el otro. Cuando lleguemos al final humedecemos el trocito de alga sobre el que no hemos puesto arroz y sellamos nuestro rollito. Con un cuchillo bien afilado contamos en trozos de unos 2 cm.

sushipasos

We chose 4 maki types:

  1. Tuna and avocado maki
  2. Salmon, mango and cream cheese maki
  3. Prawn and avocado maki
  4. Crab, mango and avocado

First lay your sushi mat horizontally on a flat surface. Then place one of the nori seaweed sheets on the mat, with the shiny side upside down. Put one layer of rice on the sheet, it doesn’t need to be thick. Remember to leave 2 cm with no rice on one of the edges of the sheet. On the oposite edge we will place our ingredients. First of all spread a little bit of wasabi on the edge, but be careful because it is really spicy! Then place the rest of the ingredients horizontally on top of the wasabi.

I order to roll it, we will start with the side that contains our ingredients. Start to roll using the mat and lifting it up while you move froward. Always maintain the same pressure so that the roll doesn’t come bigger on one side. When you reach the end, moisten the edge with no rice in order to seal your roll. With a sharp knife cut the roll into 2 cm pieces.

SONY DSC 

Acompañarlos con un poco de salsa soja, estarán buenísimos! Espero que os haya gustado! 

Mañana publicaré otra receta con la que se os hará la boca agua!

Gracias por leerme. 

Victoria 


Serve them with some soy sauce, and enjoy!! I hope you’ve liked it!

Tomorrow I will post a moth watering recipe!

Thanks for stopping by.

Victoria 


Salsa de Caramelo / Caramel Sauce

Hoy os traigo una receta de salsa de caramelo: fácil, rapidísima y que se puede hacer al microondas!

La encontré en un blog llamado ‘Cookie and cups’ y la puede hacer cualquiera, así que probarla!


Today I bring you a caramel sauce recipe that is: easy, super quick and you can do it in the microwave!

I found it in a blog called ‘Cookies and Cups’ and it’s so easy everyone can make it so try it!

SONY DSC

Para un bote de salsa de caramel necesitarás:

  • 55 gr de mantequilla derretida
  • 220 gr de azúcar moreno
  • 120 ml de nata liquida
  • ½ cucharadita de esencia de vainilla


For one pot of caramel sauce you will need:

  • 55gr of melted butter
  • 220gr of brown sugar
  • 120 ml of cream
  • ½ tsp of vanilla essence


SONY DSC

En un bol apto para microondas mezclar, la mantequilla derretida, el azúcar y la nata hasta que estén integrados.

Meter al microondas a alta potencia durante 2 minutos. Sacarlo y remover.

Volver a meterlo durante otros 2 minutos hasta que salgan burbujitas y haya espesado.

Añadir la vainilla y dejar que temple y no este muy caliente, se hará mas espeso según se va enfriando.


In a microwave safe bowl mix the melted butter, the sugar and the cream until there are no lumps.

Heat in the microwave at high power for 2 minutes. Remove to stir and heat again for 2 other minutes until bubbly and slightly thickened.

Add the vanilla and let it cool until warm, not hot. It will thicken as it cools.

SONY DSC

Servir templado para acompañar helado, fruta, galletas o lo que se os ocurra. Si se enfría completamente, calentar 20-25 segundos al microondas. Se puede guardar en la nevera 1 semana.


Gracias por leerme!

Victoria


Serve warm with ice cream, fruit, cookies or whatever you want with. If completely cooled down, reheat for 20-25 seconds in the microwave. You can store it for 1 week in the fridge.


Thanks for reading!

Victoria

Macarons de chocolate/ Chocolate macarons

SONY DSC

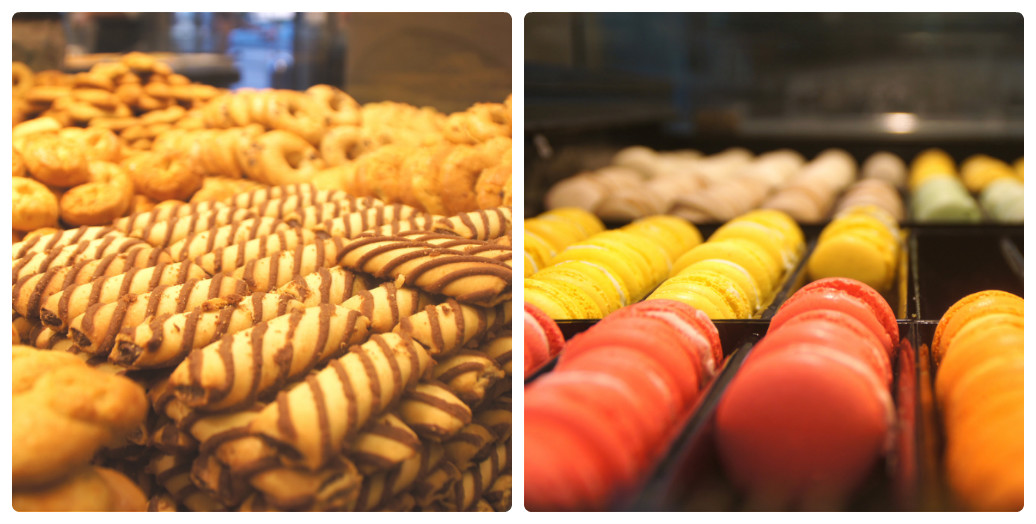
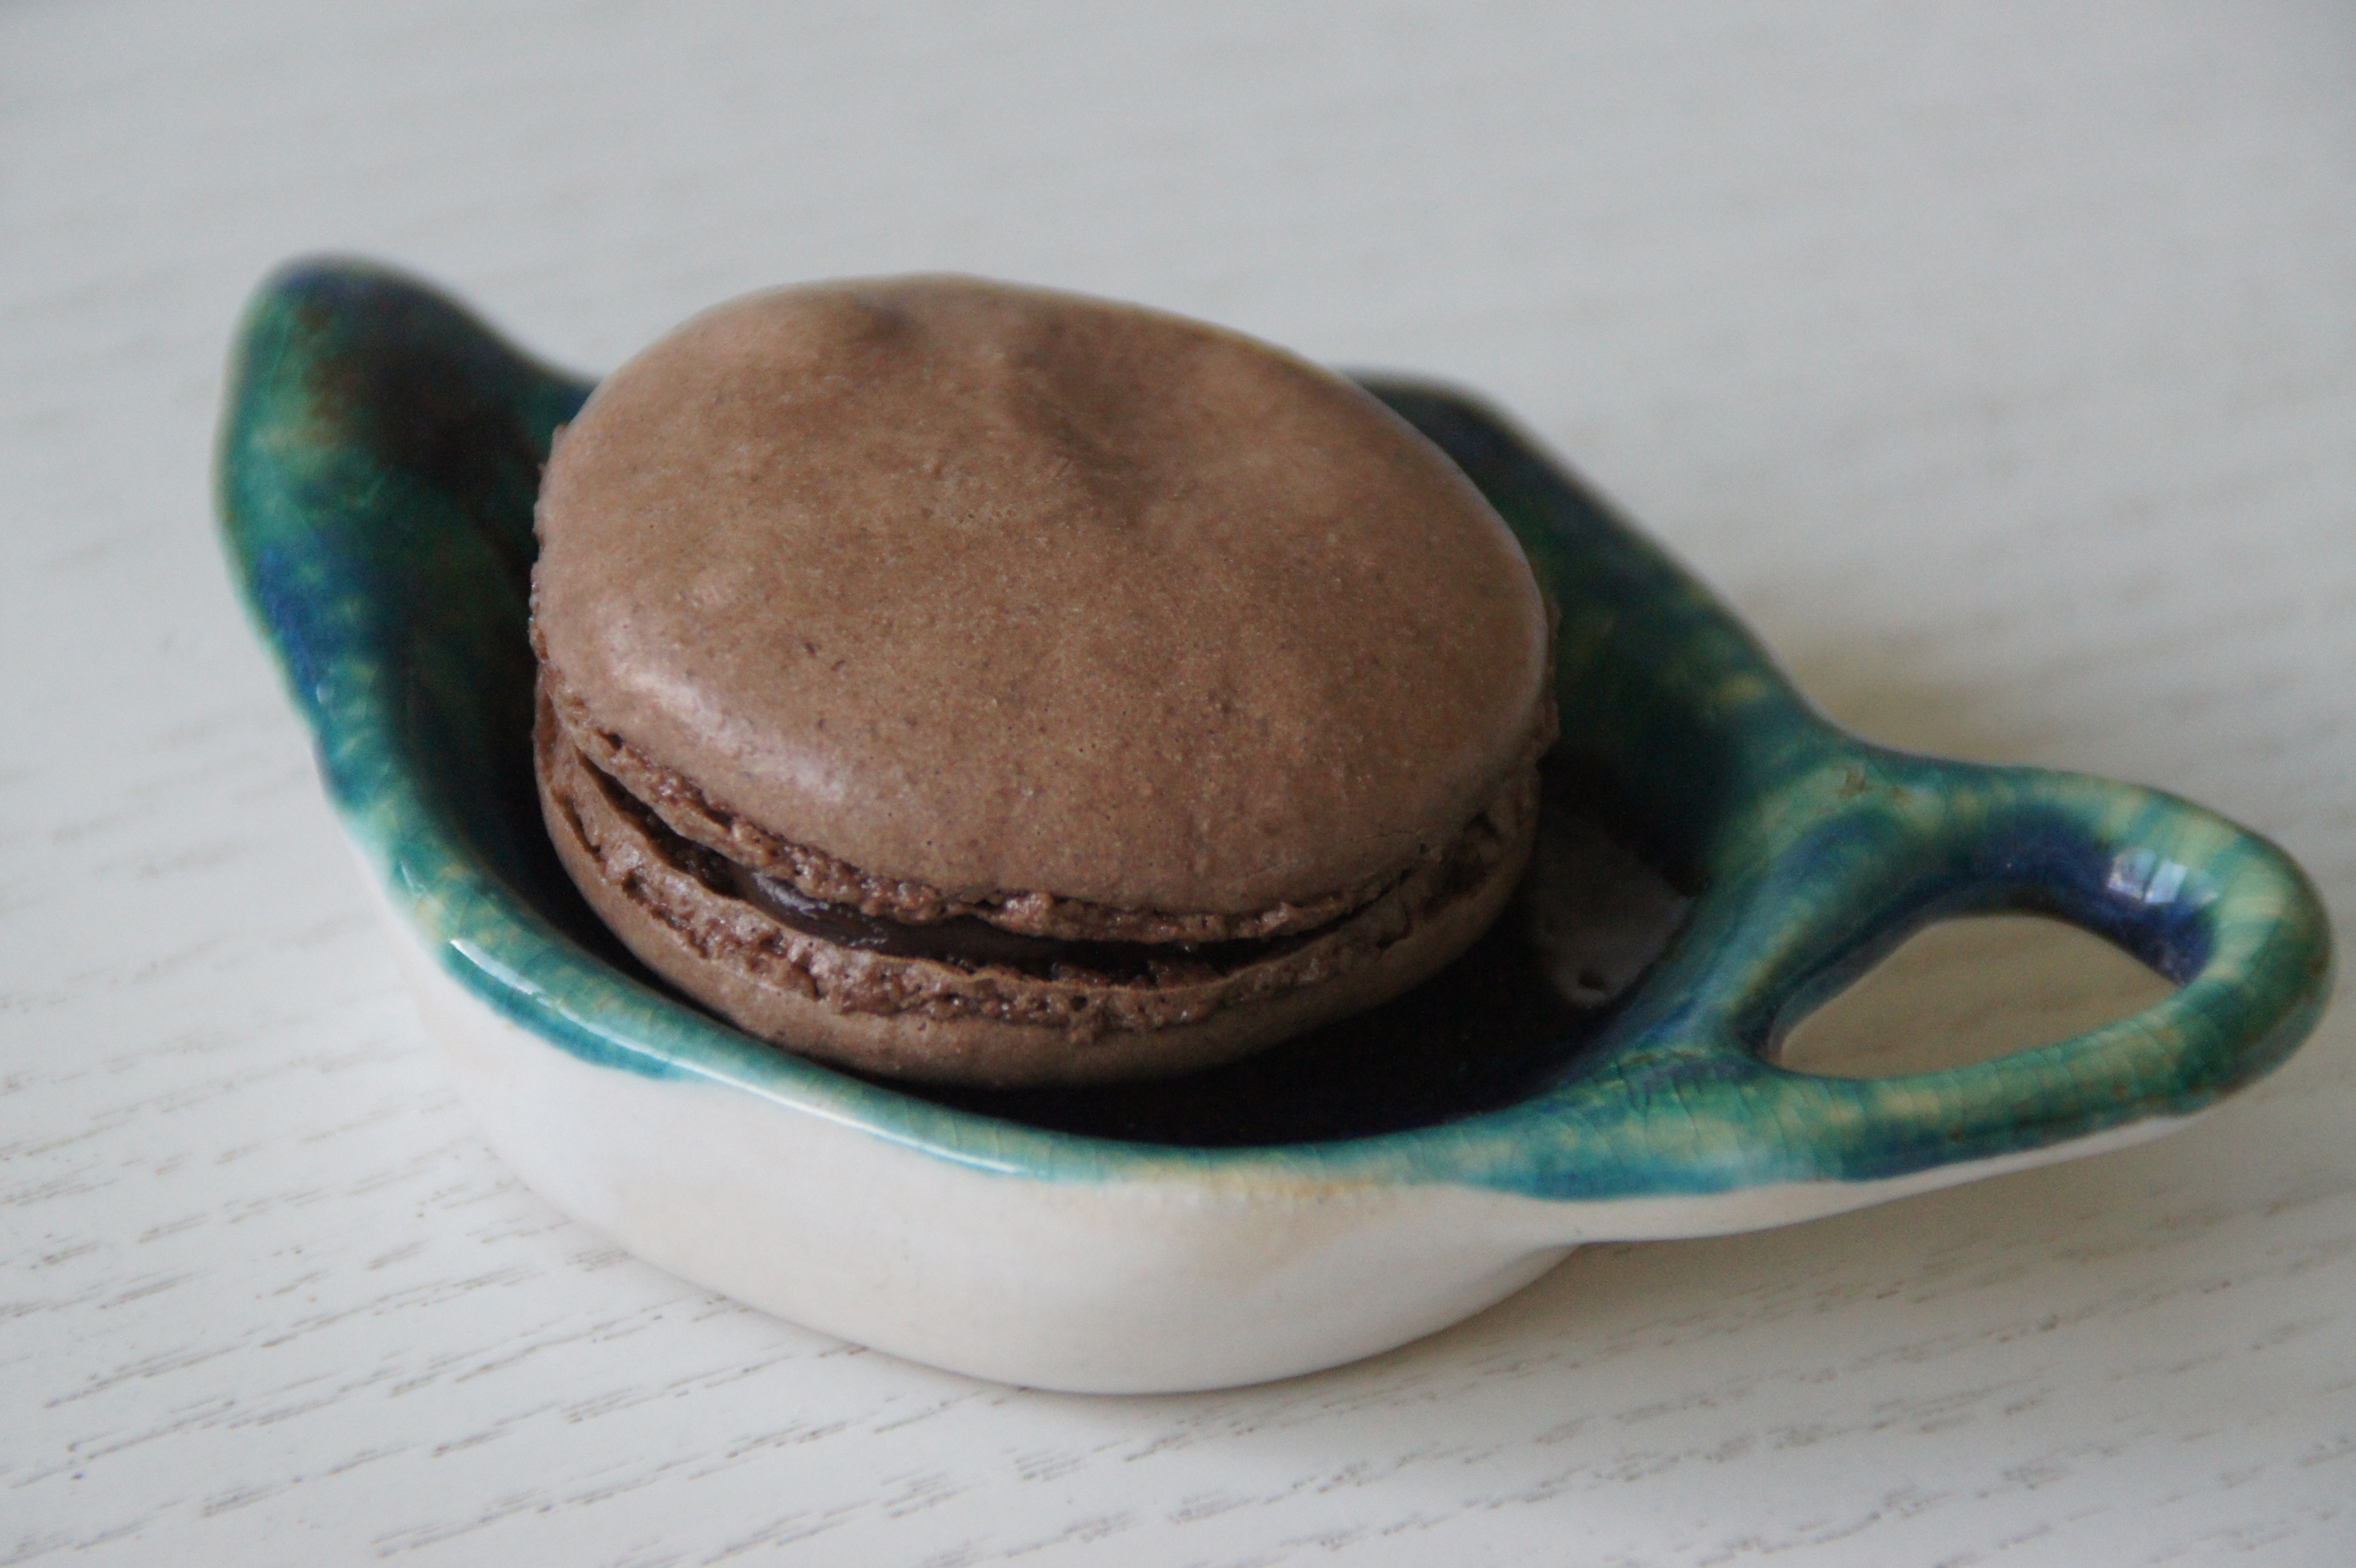
Mi dulce favorito son los macarons, son unos pastelitos tradicionales franceses a base de claras de huevo y almendras molidas. Los hacen de muchos sabores, pero probablemente los mas típicos sean el de vainilla, el de frambuesa y como no, el de chocolate.

Los he hecho varias veces y no voy a mentiros, es bastante complicado. Esta receta está sacada del libro ‘Sucré’ de la Pastelería francesa especializada en macarons : La Durée y requiere paciencia y tiempo pero veréis como merece la pena!

My favourite sweets are macarons, a traditional French pastry made of egg whites and almond powder. There are lots of flavours you can have but the most typical are vanilla, raspberry and of course: chocolate.

I’ve made them several times and I’m not going to lie, it is pretty hard. This recipe is fro the book ‘Sucré’, by the famous French patisserie: La Durée, requires patience and time but you will see that the result is worth it!

Para 30 macarros aproximadamente

– 130 gr de almendras molidas

–  125 gr de azúcar glas

– 10 gr de cacao sin azúcar

–  35 gramos de chocolate (mínimo 70% de cacao)

–  3 claras de huevo + 1\2 clara de huevo

–  105 gr de azúcar

Para la ganache de chocolate:

-180 gr de chocolate (mínimo 70% de cacao)

– 135 ml de nata liquida

– 30 gr de mantequilla

For 30 macarons approximately

  • 130 gr of ground almonds
  • 125 gr of icing sugar
  • 8 gr of cocoa powder
  • 35 gr of chocolate (minimum 70% of cacao)
  • 3 egg whites +1\2 egg White
  • 105 gr of sugar

For the chocolate ganache

  • 180 gr of chocolate (minimum 70% of cacao)
  • 135 ml of cream
  • 30 gr of butter

SONY DSC

Empezamos por la ganache de chocolate. En un cazo ponemos la nata a calentar y cuando rompa a hervir la vertimos sobre el chocolate troceado. Mezclamos con una cuchara hasta tener una mezcla homogénea. Añadimos la mantequilla en trozos pequeñitos y mezclamos hasta que desaparezca.

Extendemos la ganache en una bandeja y la cubrimos con papel film de tal manera que el papel este en contacto con la ganache. Dejamos que se enfrié a temperatura ambiente y la metemos a la nevera durante una hora.

Let’s star with the ganache. In a saucepan heat up the cream, when it starts to boil, poor it onto the chopped chocolate. Mix together with a spoon until fully integrated. Add the butter chopped into small cubes and mix again until it melts together. Spread the ganache on a tray and cover it with cling paper so that the paper is touching the ganache. Leave it to come back to room temperature and put it in the fridge for an hour.

SONY DSC

Para la capa exterior de los macarons empezamos mezclando las almendras molidas, el azúcar glas y el cacao en polvo con la batidora hasta obtener un polvo fino. Tamizamos para evitar cualquier grumo que pueda quedar. Reservamos.

En otro recipiente fundimos el chocolate al baño maría  y dejamos templar

For the macarons we start by mixing the ground almonds, icing sugar and cocoa powder with the electric beater until we have a smooth powder. Stiff the mixture to avoid any lumps. Keep aside.

In another bowl, melt the chocolate over a double boiler and leave it to cool down to room temperature.

En un cuenco limpio y seco montamos a punto de nieve las tres claras y cuando estén listas vamos echando el azúcar, en tres partes, batiendo un minuto cada vez que incorporamos azúcar a la mezcla.

Vertimos el chocolate derretido sobre las claras y con una espátula de goma lo mezclamos e inmediatamente incorporamos las mezcla tamizada de almendras, azúcar glas y cacao.

En otro cuenco batimos la media clara restante y cuando empiece a formar espuma la añadimos a la mezcla y removemos con cuidado.

In a clean bowl whisk the 3 egg whites until stiff peaks are formed. Once this state reached, add the sugar in 3 parts beating 1 minute after adding each part.

Poor in the melted chocolate and integrate together with a rubber spatula. Immediately after this add the mixture of ground almonds, icing sugar and cocoa and mix.

In another bowl whisk the half egg white until bubbles appear and add it to the mixture mixing really slow and carefully.

SONY DSC

Introducimos la mezcla en una manga pastelera con la punta cortada. Cubrimos una bandeja de horno con papel de horno y formamos pequeños círculos de 3-4 cm. Movemos un poco la bandeja para que se extiendan bien.

Precalentamos el horno a 150ºC y dejamos los macarons reposar 10 minutos antes de hornearlos durante 16 minutos, hasta que se forme una ligera costra.

Put the mixture into a piping bag with it’s tip cut. On a baking tray lined with oven paper form small circles of 3-4 cm. Move the tray so that the macarons expand correctly.

Preheat the oven at 150ºC and leave the macarons to rest for 10 minutes before baking them for 16 minutes until a slight crust is formed.

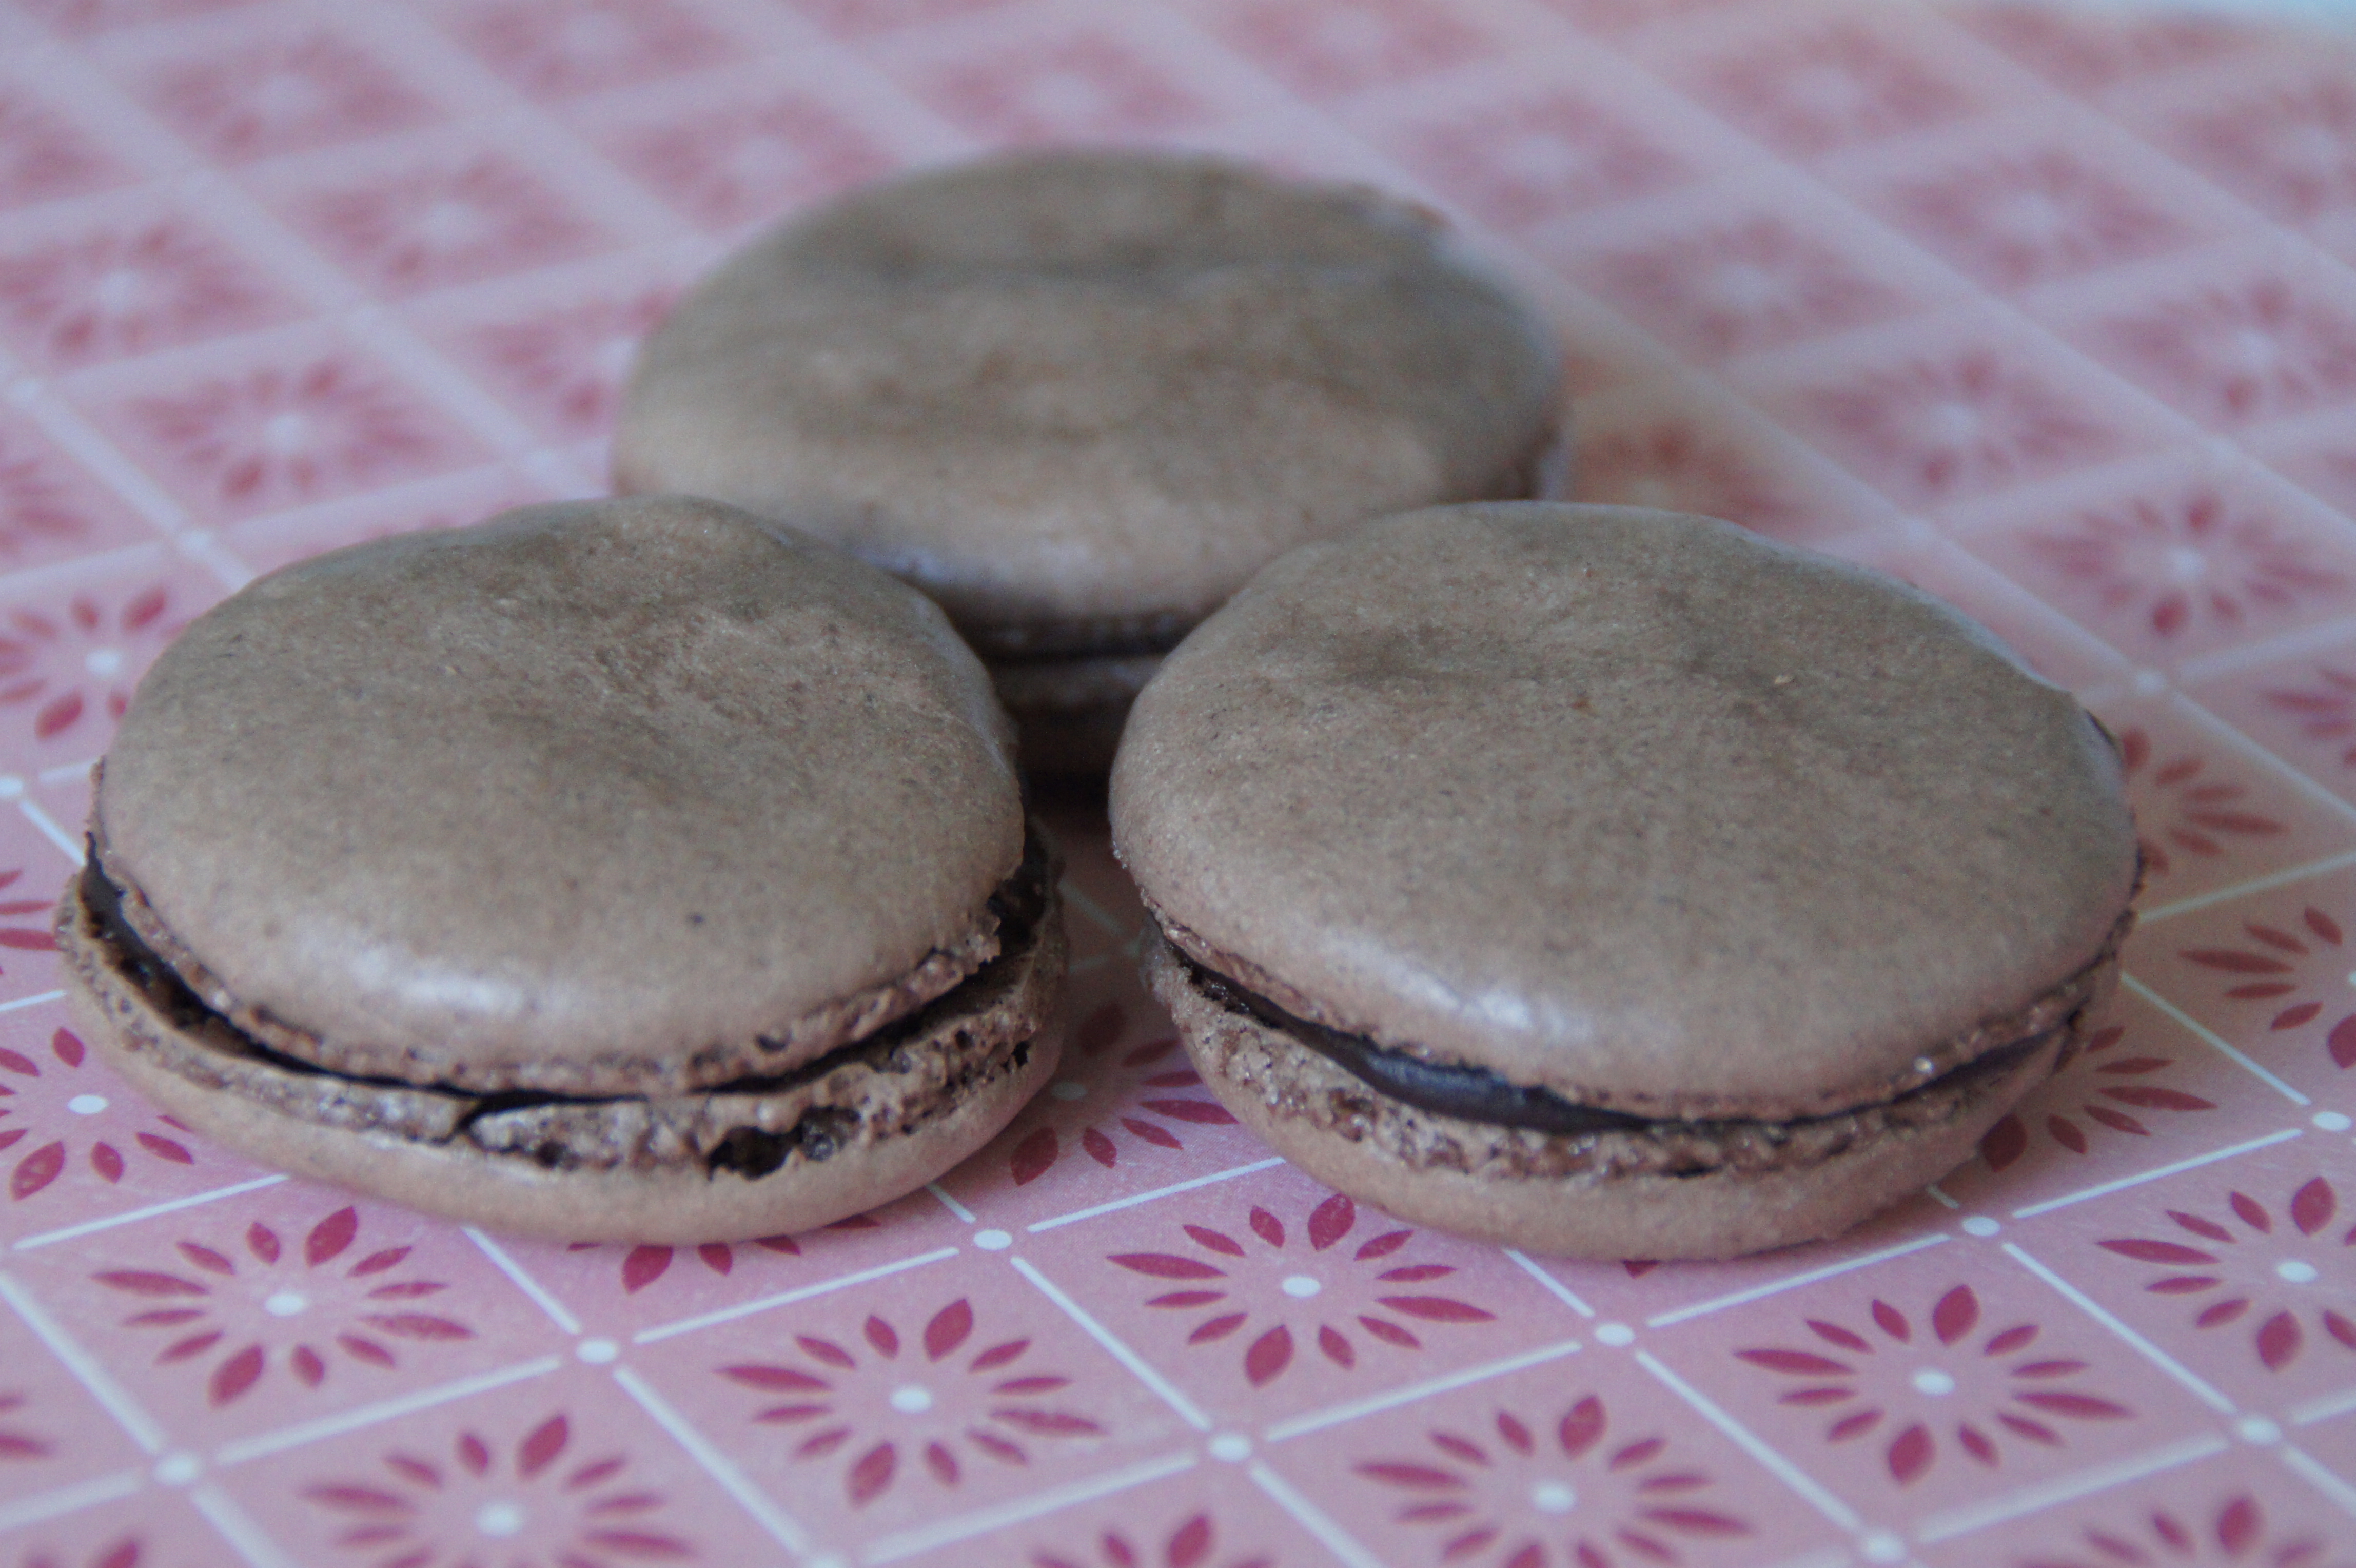
Esperamos a que los macarons se enfríen completamente antes de despegarlos del papel. Ponemos baca abajo la mitad de los macarons. Los montamos poniendo un poco de ganache, que habremos metido en una manga pastelera con boquilla lisa, sobre los macaron que están boca abajo y coronamos con las tapas restantes.

Los guardamos en un recipiente hermético durante 12 horas en la nevera.

Wait until the macarons have completely cooled down to separate them from the oven paper. Turn upside down half of the macarons. Assemble by putting some of the chocolate ganache, which we have previously put in a piping bag with a round nozzle, on the macarons that are upside down. Top them with the rest of the lids.

Keep them in a hermetic container for 12 hours in the fridge.

SONY DSC

Sé que esta receta es larga y complicada pero seguro que con paciencia conseguís realizarla con éxito!

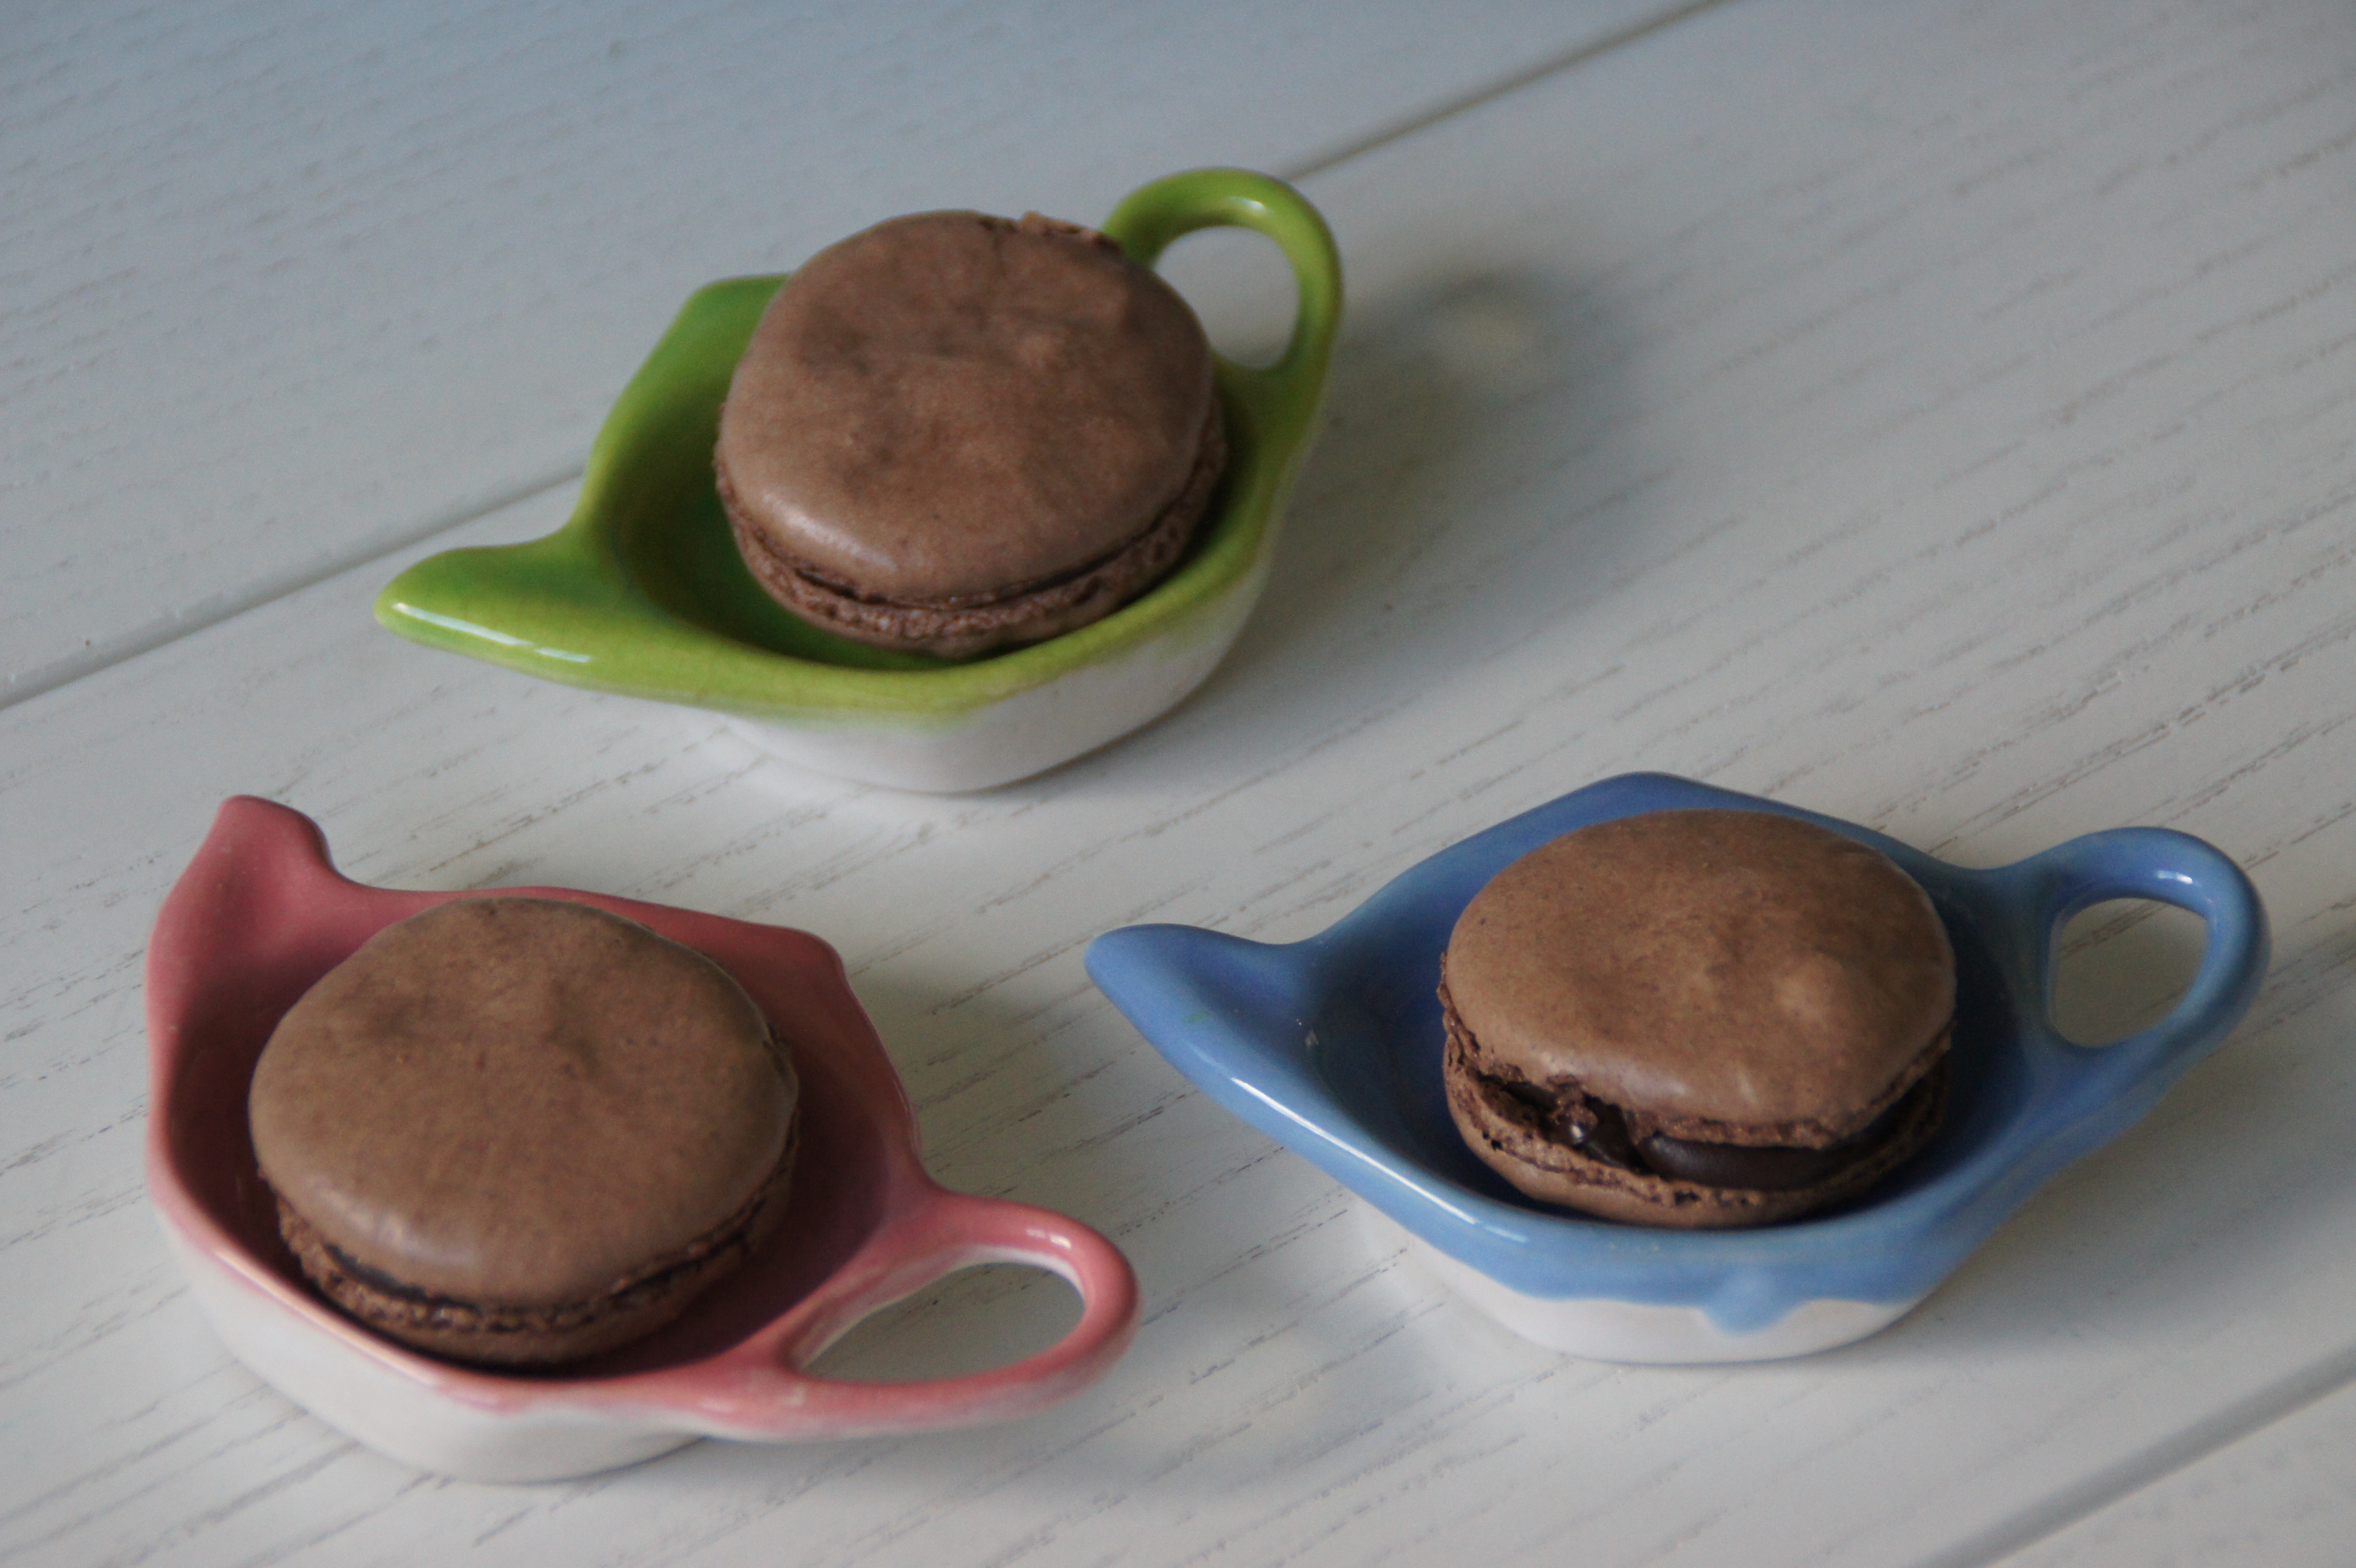
Ahora disfrutar de vuestros buenísimos macarons!
Victoria

I know this recipe is pretty hard, but with patience I’m sure you can pull it of!!

Now enjoy you delicious macarons!

Victoria